Wednesday, February 9, 2011

The Scribe

My newest project based on this painting which appears on the cover of a book called
"Scribes and Illuminators" by Christopher Hamel. 

Despite surfing the web, I haven't been able to determine who the artist was but I was inspired by the image.

Here is my interpretation...

The chair has been aged and distressed and
covered with reclaimed blue leather.

The stack of reference books can be removed from the chair but they are attached to each other.


The fabric bag filled with completed scrolls can also be removed from the chair back and the scrolls can be removed from the bag if desired.


 The table has also been aged and distressed. 

The scribe has extra blank scrolls and inkpots
at hand and a piece he is currently working on.

There are finished manuscripts under the table
and the key to the scriptorium.
All the items are permanently attached to the table.


A close up of the left side of the table shows the illuminated candle and the magnifier used to intensify the candlelight.  This can be plugged or wired directly into dollhouse or roombox wiring.

A close-up of the right side of the table shows the multiple colored inks used in the process,
including a special container for the gilding ink.

I will be offering this for table and chair for sale at the Orlando Miniature show this weekend. 

If I still have it on Monday morning, I will be listing it on Etsy.

I've been thinking about this project for a while and I had a lot of fun putting it all  together. 

I hope you all enjoyed seeing it!

Later...

Tabitha

Friday, February 4, 2011

The League of Extraordinary Gentlemen....

...or at least, their hats!  :-)


Here's a quick (and unedited) photo of the hats I made for next weeks show.  The two I made last time were snapped up quickly and people came back asking for them so I thought I put together a few more.

They are all made from leather and do have "hardware" in the back as well.  Goggles are not removable.

...and this is one of the many reasons why I haven't finished the dollhouse...

Tabitha

Thursday, February 3, 2011

A new challenge...?

I realized I haven't put anything on my blog in a while.  I've been working on getting ready for the Orlando Miniature show next week and, while I have been trying to keep up with what others are up to, I haven't found time to update.


So today's the day.  


Here's my first (and really, only) dollhouse. and, yes, I do realize it is still decorated for Christmas....
(The pictures should get larger if you click on them.)


 I bought it as a kit when Matt was 8 months old.  Some of you may recognize it as the Real Good Toys "Bostonian".  For some reason, back then, I wanted a REALLY big dollhouse.  I figured, why not?  How hard could it be?  HA!


It has a side entrance and I cut out a window on the opposite for French doors.  The plan was for a garden or conservatory.  I purchased the Conservatory from Houseworks but it is still in the box.  I actually don't think it will fit without a lot of kit-bashing.  Plus the cabinet it is currently on just fits so I'd have to look for a longer table. I am displaying it as a "wall" between my living room and the entrance to our bedroom area.  We have a pretty open floor plan and this allows the house to be seen easily from both sides.


Here is the view from the back.  You'll notice the rather sophisticated dust cover hastily thrown back :-)

You will also probably notice that it is not done.  As a matter of fact, it is so not done that I've been considering getting rid of it.  But who'd want a half-done dollhouse?  Here are some close ups:

This supposed to be the "parlour". I moved the lefthand wall over a bit to make room for a larger staircase (which never quite happened) and decided to make it a dining room/parlour combo...with the French doors out to the garden...or whatever.  I have a lovely cherry artisan made dining set to put in the front near the windows but, alas, it is still in the box.  Never could find any suitable parlour furniture.  Sigh...


This was called the Dining Room but because I had other plans, I made this the Kitchen.  It is one of only two rooms I consider sort of "done".  I do like the blue furniture... it was made by the same man who made the dining room furniture.  There is a round topped table behind the work table with two pretty rush-seated chairs and the cute little high chair.


For some reason, I am missing the close up of the room to the right of this one.  No loss...it isn't done... It was designated as the Kitchen but, of course, I already had one so I'd thought it could be the gentleman's office with a private entrance.  Maybe he was a doctor... or a lawyer? Or something more exciting...?


This room was called the Master Bedroom and I did sort of keep it that but....then I decided to cut out the arch which is just visible on the left.  It has a pretty grille work in it whic you probably can't see too well.  Of course, that created a problem for me regarding a "door".  And certainly one would want a door on a bedroom.  Still haven't solved the problem.  One isn't commercially made to fit the opening so I'd have to make it.  While I am sure that I could do so (the wall isn't permanently in yet), I obviously am procrastinating.


Mmmm...maybe it could be a ballroom? Or something....else.


On the other side of the hallway is another room designated Bedroom.


I could be considered "done" except for window trim and treatment.  I was holding off as I was told that window treatments hang much better if there is no trim.  Jury is still out on that but, in the meantime...not done.  Except for my Gail Steffey leather wing chair, I don't "love" any of this furniture. I bought the bed already dressed.  It was inexpensive and I thought it was pretty at the time.  It still is pretty but.....  The armoire is nice and would look great all dressed out...if I ever got around to it.


To the right of the above is a room I thought would be a nice Nursery.


Because of the layout of the house, this room (and the "Office" below it) is much deeper than the rooms next to it.  To cut down on the tunnel-effect, I built the shelves in at the front. I wanted a light above the window but since it was an after-thought and I didn;t plan for it when I wired the house, I haven't devised a way to hide the wiring...bleh.  And again, no window trim as no ideas for curtains.


On to the third floor.


Way on the right, over the Master bedroom, is a room with an odd shaped ceiling and a window to a balcony.  It said Boy's room to me...I  could just envision his 10 year old self crawling out the window to look at the stars with his telescope.


But the wainscoating was a disappointment and really needs to be removed (somehow) so I never went further with it. Truthfully, it upsets me to even look at it.


Across the hall is the Bath.  Or at least that is what I decided it was.... :-)


It is the only really room I consider "Done", even thought it is missing door trim on the right.  That trim is all cut and ready to install as soon as I decide what to do with the hallway next to it.  I love the Victorian bath fixtures.  Like the Boys room, it has an oddly shaped front wall (due to the mansard) so I built a small knee-wall and "tiled" it like the floor (which is actually wallpaper).  The biggest problem with this room is furniture placement due to the opposing doors, especially the door to the left.


Yea...that door the left leads to yet another BEDROOM!!!.  See, there are way too many bedrooms here and I'm thinking it's a little BORRRINGGG>>>>


Whew...anyway...here is the FOURTH bedroom.  I guess it is nearly done also except for the window and door trim.  But I don't think I could stand another bedroom in this house. 


Any suggestions??? A library?  Anyone???


Oh yes....this is the "Attic"...a small, windowless room to the left of the one above... A room for junque!


And the Hallways.....  no stairs...but a single French door leading out to the front balcony.


So there you have it.  A house that has been sadly ignored for almost 17 years while I did "other" miniature stuff.  While I keep on doing other miniature stuff.  I have to ask myself "why?".  I think because I just don't like the style of this house.  It is way too Pretty....starting with the outside.  I thought I liked the idea of a Painted Lady.  I cannot tell you the hours I spent painting the window trim in THREE colors.  But now I really don't.  It's all too clean, too precise, too....stuffy.

I am thinking of a major renovation and transformation, employing all the techniques I've learning over these 17  years.  Starting with the outside.

The style of the house is somewhat Italianate..and I'd like to get rid of the clapboard (which was only milled into the plywood anyway) and the color.  The roof and shingles are good.  They can stay, but the rest is HISTORY!!

Stay tuned....  I'm off to do research!

Tabitha


Friday, January 14, 2011

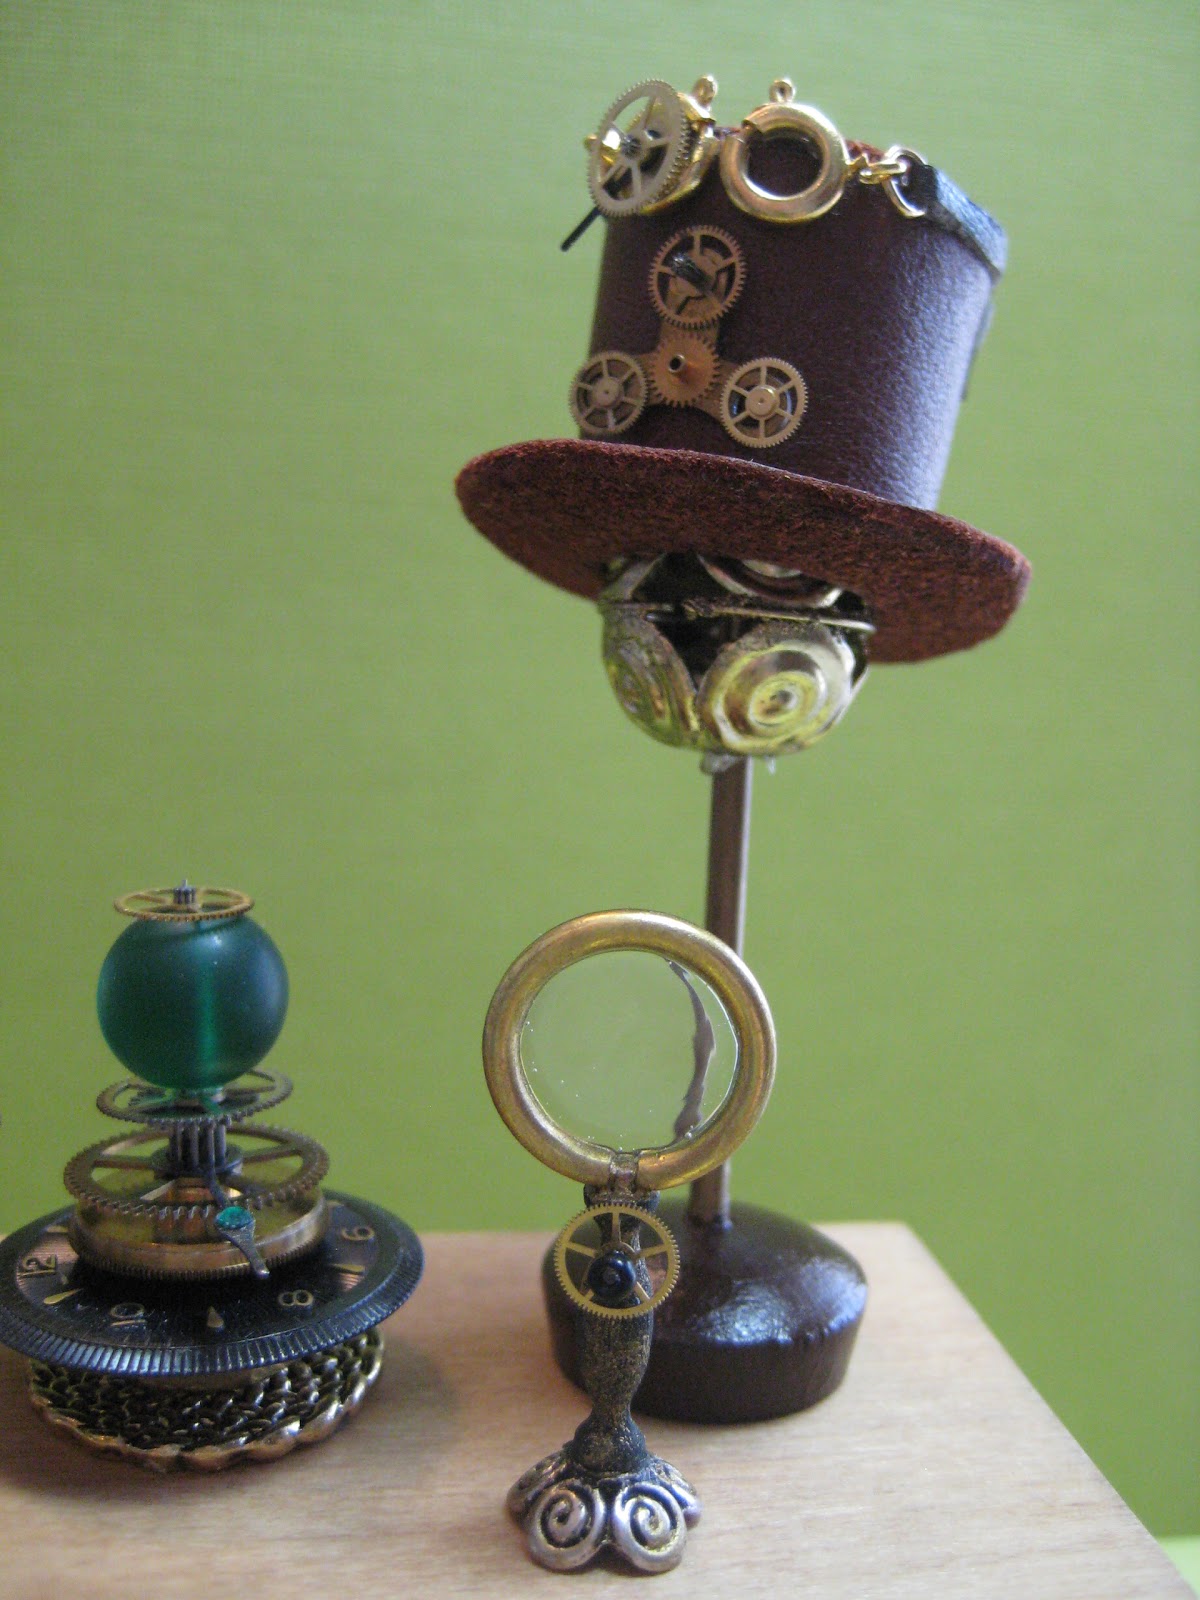
Steampunk Collection


I know it has been quite awhile since I last posted anything on this blog but I have been busy, busy, BUSY!

I made a 1/24 room box for my sister for Christmas (subject of another post) and that took so much time ... it is not my favorite scale to work with, mainy because of the difficulty finding accessories.

But I digress...

This Sunday is the Sarasota Miniature show and I wanted to show you the Steampunk items I've made to offer for sale.  Some of you may recall that I have a rather large, and unfinished, "dungeon" type room box.  After much thought, I have decided it would make the perfect workshop for a Steampunk inventor.  It all started when I saw Lorraine's Steampunk wand...which I snapped even before the paint was dry.  It really was my inspiration for the entire room.

In line with that, I thought I'd gather a collection of Steampunk items for the show.  I have several clocks, some Tesla Electric Current devices, magnifiers and, of course, the zany leather top hats, complete with goggles!

I'll be quiet now and just let you look at the pictures....


Later...

Tabitha

Saturday, December 11, 2010

Glitter house redeux...

As charming as the pink glitter house was, I thought the colors just weren't right for the red and green hutch.

So I made a little red school house by modifiying the orignal pattern just slightly.  (I'm not selling this so please, Martha Stewart, don't sue me...)


It is just barely 1 inch high to the top of the bell tower.


The tree is a chenille stem that I attempted to trim into a conical shape.  I might try trimming it with some tiny beads if I can find them in my stash and they turn out to be the right colors.....

 I used white ultrafine glitter over everything....it looks much better in person, really...


I think it looks much better with the rest of the decorations than the pink house which I am sure I will find a suitable place for...eventually.  Righ  now, it is residing in the Christmas Conservatory, though I already have one there so it cannot stay.  It will have to find a place of it's own in time...as must we all.


In case I don't have a chance to say it later...

Merry Christmas one and all!

Tabs

Wednesday, December 8, 2010

Mini Club Christmas Swap.....

...oh wait...!   This wasn't even on my list!   Oy....sigh..

But I am happy to show it to you all because it is, in fact, one of the few things I've actually finished lately. 

I am new to this club and still feeling my way around.  Instead of a meeting, they have a Christmas Party in December, hosted by one of the long-standing members.  And there is a gift swap. 

So this is what I decided to make.

It's a simple Michael's cabinet that I shabbied up a bit with a wedgewood green paint and then dry-brush with pale gold.  I changed out the knobs on the non-opening drawer and added some laser-cut trim to the corners. The word "Presents" is from the scrapbook store, the red sparkly tree used to be a green flocked bottle brush tree that I beached and glittered and decorated with some gold beads.

I filled the shelves with one of the candles I made, some wrapped "pressies", a plate of bonbons from the dozens made for Alice's party, Christmas cards, and the sweetest little glitter house from a reduced Martha Stewart pattern. 

(I have several little houses from Carol at true2scale that I've still to put together but that is for another post).

I am rather proud of the tree ornaments hanging from the knobs and shelf.  They are made from beads.

I like the free-standing pieces I make to look interesting from all angles.  Here is the back of this one...

The picture and border came on a large punch-out page with several others fromt he scrapbook store.  It was from this I chose the colors for the cabinet and accessories. 

It also serves to cover up the wires from the LEDs...   This little cabinet lights up!


There is a 1.8mm LED in the corners of the upper shelves.  These are 3 volt bulbs and are connected to a nickel-sized lithium coin battery tucked neatly away under the cabinet.  The little white "thing" on the bottom is the switch which works so smoothly...like silk off a spool!

I had to add an apron, front and back, to hide the battery pack so I used my coping saw to replicate the decorative work from the top.


I think it turned out well and I hope whoever gets it at the party likes it.....

Now....back to work!

Tabs

Tuesday, December 7, 2010

The Christmas Cottage....


Today, I sent my mother a Christmas card with this picture on it.  If you don't recognize it, it is one of Thomas Kincade's Christmas cottages.  I absolutely fell in love with it when I saw this card. 

I want it.....in miniature of course.   So I decided that I am going to make one.  Or one similar to this.  I have, for a long while now, planned on a Toy Shop (or something like that) and I think this would be a lovely Elves Workshop.  I just love the big leaded window..the stone work..the timbers.  Beautiful.

Anyway...I am going to do it.

Right after I finish my sister's Christmas present....and Prof. Pymm's Study....and the crazy inventor's lab (yet to be named)...and the Ruins of Camelot...

And do a blog post about LEDs....and an "Ask Tabitha" post about several things people have brought up..

And then there's the 200 followers give-away post....and the one about the lighted cabinet....

Mmmmm.....I am really going to have to get a girl in here to do all my other work so I can just concentrate on mini's.

Fat chance....

But before I do anything else, I really must get the ornaments on my tree.  I should have done that yesterday but I spent the day "sanitizing" my hubby's office.  He rarely allows anyone in there to tidy up never mind vacuum or dust so I had to strike while I could.  Today I was taken up with laundry and God's knows what else...the day just flew by.

Tomorrow doesn't look too good either...sigh....

I'll keep you posted.

Tatty Tabitha

PS:  Just the other day, I was referred to as a "scrappy renegade" so I guess I can add that title to the list....