Saturday, March 19, 2011

Conservatory Floor - Using DAS Air Dry Clay

I needed to wait for the spackle on the walls to thoroughly dry before I “washed” them so I decided to go ahead and plan out the floor. The kit came with a 12x12 piece of 3/8 inch thick MDF meant to be used for the floor. I will be making a base for this so I can meld it to the house but for now, I wanted to plan and layout something for the inside of the Conservatory.

I really dislike MDF…I’d rather use Gator board or even the paper-covered foamcore from the Dollar Store than deal with MDF. But since it was the material included, I bit the bullet and forged on.

There are two reasons why I hate MDF. First, it is heavy. Second, it warps…badly. It just sucks up any available moisture if not sealed. I used a coat of white glue to seal the little bit of MDF used on the walls but this was a large piece and I was looking for quick and easy.

I did have some spray sealer by Deft that I’ve used before but I didn’t want to set up the spray booth in the garage. I also happened upon some acrylic matte medium so I decided to see what happened if I brushed that on.

I slathered a light coat of it on both sides and all four edges and let it dry. I dried really quickly and left a slightly rough texture on the board. .. and no warping noted! I thought the “tooth” left from the matte medium might help whatever I used for flooring stick better.

I set the dry fitted Conservatory walls on the base and penciled in the interior. I only wanted the inside done; I was planning something else for the exterior. I was looking through my stash of faux marble tiles and brick stenciling kits when I heard a “tsk….”

“The inside of the Titania’s Conservatory is flagstone…like she saw in old castles on her trip to England as a child. I thought you knew…..”

I turned with a question but Hester had flounced off… I meant to ask about color. I am sure she will advise me in time. Hopefully before I start painting.

So flagstone it is.

I didn’t have any Creative Paperclay and though it is readily available in the US, I didn’t want to make the trip into town to get some. I did have some white DAS air drying clay, however, which I bought at Michaels when my UK friends said Creative PaperClay was nearly impossible to get over there. I’d wanted to see if this stuff was comparable. It certainly is cheaper. It is made in Italy, which was all the information I could get off the package as it was all in languages other than English.


It comes in a 1 kilo (2.2 lb) package. I had the “white” , though I would have called it grey...also comes in terra cotta. It is much heavier and denser than Creative PaperClay but it is not as sticky. It has a more leathery feel.

I tried rolling it out as I do PaperClay but it took more elbow grease.

I think it would have run nicely through the pasta machine which I will do if I use it again. It also doesn’t “seam” as nicely as PaperClay does if you are piecing it…which I had to do for the floor.

Before I applied it, I brushed Elmer’s Glue All inside the pencil line.


A lot of people don’t glue their air dry clay to the substrate but that is how I was taught to do it. I think it helps with the shrinkage, though I didn’t notice much with this product. I rolled it out to 1/8 inch thick on my rolling board.


When it was all in place, I spritzed it lightly with water and covered it with a damp paper towel. As I worked, I folded the towel back, bit by bit. I didn’t notice much premature drying except at the very edges.


I used the same tools as I use for PaperClay. The DAS is a little stiffer so I had to press a little harder but otherwise they all worked fine.

It took a lot longer to totally dry than PaperClay. I can usually paint PaperClay within 12 hours but this is going to be a good 24 hrs before I can do that.


The only cracking was where I had to seam it and only slightly. I filled that in with some lightweight spackle. I don’t yet know if will be apparent when painted.


Like PaperClay, it will shrink away from a cut edge. See where I made the groove a little deeper than I should have…where I didn’t cut through, the edges of the “flagstone” are fine.


I used about ½ of the package for the floor and sealed the rest in aluminum foil and put it in a freezer grade ziplock bag. I can usually “freshen up” PaperClay “ that has gotten dry but I don’t know if that will work with this clay. The fact that it didn’t seam that well using water makes me think that it won’t. But sometime, I’ll try an experiment to see.

Overall, I like this product. Despite it’s odd smell when wet (I can only describe as the smell emitted by working machinery…like ozone..), it is a pretty good substitute for Creative PaperClay. It was much less drying to my hands and required little clean-up as it really didn’t stick to my tools as PaperClay usually does.

But I will still use PaperClay, depending on the project. PaperClay is much lighter when dry.

I should be ready to paint both the “stucco” wall and these flagstones by tonight but unless I get word from “herself”, I’m a little nervous about the color of the flagstone.

I’m sure I’ll get it wrong and never hear the end of it….

Later,

Tabitha


Thursday, March 17, 2011

Conservatory Walls

I was quite pleased with the windows so I put them aside to tackle the walls again.

According to Hester, Titania was an accomplished musician at an early age.  She played both the piano and violin.  The piano was kept in the ballroom (...really MUST find out where that ballroom is...) but she often practiced violin in the Conservatory amongst the ferns, orchids and other tropical plants, not to mention the odd parrot or two.  Her adoring father spent a fortune importing the exotic flora and fauna…. Strangely enough, most of them survived during the time the Conservatory was closed and are still flourishing.

Note to self: search Internet for miniature tropical plant kits; employ elves to make up kits.

Better yet, find plants already made…

Since this conservatory will be more “greenhouse” in flavor, I decided the exterior and interior lower walls would best be finished in the same way. The exterior would, of course, be more aged and dirtier than the interior.


After considering stone/brickwork, using either paperclay or egg cartons, I settled on a “stucco” look using light weight spackling compound.

 I used Patch ‘N Paint, which is the store brand for the local Ace Hardware store but I have used Fast ‘N Final by DAP which is exactly the same thing. I am sure other manufacturers have their own label. This can be found in the Paint aisle of any hardware store.

It has the consistency of buttercream frosting and is very easy to work with. If it gets a little dry, small amounts of water can be added to loosen it up. I used it white, straight out of the container but it can easily be colored with powdered tempra paint or even grated chalk. Using liquid paint to color it can  thin it out too much so be careful if you do this.


I wanted to seal the substrate (MDF) so it wouldn’t warp as the spackle dried. MDF has a tendency to absorb water so I first brushed on a light coat of full strength white glue (PVA) and let it dry.

I whipped up the spackle with a rubber kitchen spatula and applied it to the appropriate areas with a palette knife. I tried various means of texturing (small brush, etc.) but the tip of an old dull kitchen knife worked the best.

IMPORTANT: If you are NOT using disposable tools, be sure to wash up your tools before the spackle hardens.

First I coated all the exterior walls and then, when that was set, I turned them all over and coated the interior walls. I will wait a full 24 hours for this material to cure before I paint/age it.  I am sorry these photos are not rotated properly but I think you can still get the idea.

The magazine article I reference way back at the beginning also employed a stucco medium for the outside walls only. A combination of premixed grout and tub/tile caulk was used.  I cannot speak to how well the grout/caulk mixture worked or the ease of application but I’d guess it was fine. The pre-painted embellishments used on that project were applied right on top of the stucco.

I had some tub caulk but no premixed grout.  However,I did have the light weight spackle. Since I’d used it before, I felt comfortable with it in this application. I vowed to complete this project using only what I had/have on hand.

Later,

Tabitha


Monday, March 7, 2011

Conservatory Windows and Roof Glazing

I discovered a bit more about the mysterious Titania today...
 
She was the original owner’s much adored and doted upon youngest child and only daughter.There were two brothers, considerably older and out of the house when she came along. She died at age 22 during a Spanish Flu epidemic, according to the family bible (kindy delivered to my studio by Hester). And her father followed not long after. I didn’t see anything  about her two brothers. Or the current DeBellows…. Hester had “things to do” so I got no further information and I returned, even more curious, to my work...
 

I took a break from the Conservatory walls, mainly because I couldn’t decide what to do about the lower panels on the inside but also because I was disappointed in the way the walls were resistant stain in many places, due to sloppy gluing at the factory.

I had removed all the windows… and they were just laying there whining, “Me next! Me next!”… What choice did I have??

I wanted to achieve a leaded glass look and initially thought to do away with the grids altogether and use lead or copper tape directly on the Plexi. However, that proved to be a little dicey for a number of reasons. The biggest concern was the loss of the stability of the frame. After several false starts, I chose to use the suggestion in the magazine article I referenced at the beginning and cut out only certain parts of the mullions.


The author of that tutorial used a craft knife to do the job but I stumbled upon something I’ve had around for a while. It’s the coolest little saw blade that fits into an Exacto handle.

Worked like silk off a spool! Only required a bit of touch up sanding. One of the things that happened when I tried the craft knife was that the pressure required to make the cut usually pushed the mullion right out of the frame at one attachment point or another, causing splintering.

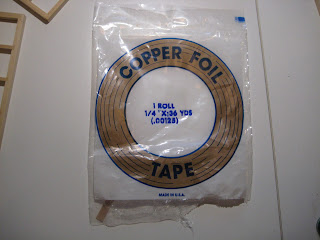
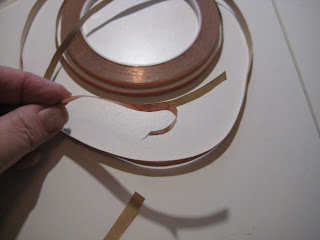
I had copper tape left from an old stained glass project, so I tried wrapping the mullions and frames with it, in an effort to get that leaded glass look.


However, I quickly realized that the “time cost” required to cover each tiny bit and then age the copper was not equal to the outcome. In other words, it wasn’t going to look any better than if I painted them…as I had done to the roof assemblage.

If you ever make this kit, I have one word of advice concerning the windows. Before you remove them, mark where each came from. Saves a lot of time refitting because even though they might look the same…they are not.

I gave each window (including all four sides of each and every mullion…) a watered down coat of a terra cotta craft paint, except on the sides which will be glued to the inside recess of the window openings in the walls. I think the terra cotta made a good base for the faux finish.

After that coat dried thoroughly, I re-sanded each and every little mullion. Fussy, but necessary for a smooth appearance. I have this wonderful set of sanding sticks/detailers I picked up at a local woodworking shop, WoodCrafters. It is a chain store. Four different grits with replaceable belts. Great tool for miniaturists who work with wood.

After the sanding, I turned my attention to the exterior side of the window. The Plexi sets into the recess and covers this surface, so technically, it is not exposed. Yet, it would still darken over time. Except for the outer edges which are covered by the exteriors walls, all window exteriors were given a wash of metallic copper which was then dulled slightly with a heavier wash of burnt sienna, followed by a light sanding when dry.

Then I concentrated on the more time consuming interior portion of the frames.

This surface, though exposed to the warmth and humidity of the Conservatory, was lovingly cared for while Titania was alive so it did not age in the way the exterior “copper” surfaces did.

(As with many victims of the Spanish Flu epidemic, she was alive and healthy one morning and dead by the next day. Her grief stricken father ordered the Conservatory sealed, just as she had left it. And so it stayed until after Aloysius’ death several years later. Livy re-opened it and the copper windows were cleaned. Unfortunately, Hester is stretched too thin to keep up with it these days and Sir Kendrick can’t be bothered.)

When copper sheeting ages, it first loses the shine, then it darkens in an uneven pattern and only after much exposure does the green patina begin to form. This also does not occur in an even way and is often quite streaky.


Several years ago, I had the opportunity to watch a natural copper roof age on the new Science bldg at the local community college. Because of our high humidity and salt air, it didn’t take long for the roof to darken and the patina to form.

The interior of the windows took six layers of finish. First a general terra cotta wash, then a darker burnt sienna “over-wash”, some burnt sienna “low lights” (patches of darker color), a wash of the green patina color and then areas of darker patina.

I wanted a final layer with just a hint of the original luster so I used mica powders in copper and green. These are meant for use on raw polymer clay or stamping but by applying the “perfect medium” first, included with the powders, it will stick to almost any surface. When it was dry, a light buffing with a soft cloth brought out the warm glow.

The window on the left is treated with the mica powders.  The one on the right is not.

This will need a spray of clear coat to become permanent.

The glazing beams for the roof received a coat of metallic copper, a heavy wash of burnt sienna and several heavy washes of the patina. They are totally exposed and would have aged naturally. I am thinking of using some of the green patina mica powder on these beams also. One board was turned over so you can see the first step in the process.


The next time you see all these roofing pieces they will be assembled into the roof structure. The instructions in the kit call for leaving this as a cover which can be removed for access. Based on my dry fit, I am not sure how this can be accomplished….

Later...

Tabitha