She was the original owner’s much adored and doted upon youngest child and only daughter.There were two brothers, considerably older and out of the house when she came along. She died at age 22 during a Spanish Flu epidemic, according to the family bible (kindy delivered to my studio by Hester). And her father followed not long after. I didn’t see anything about her two brothers. Or the current DeBellows…. Hester had “things to do” so I got no further information and I returned, even more curious, to my work...
I took a break from the Conservatory walls, mainly because I couldn’t decide what to do about the lower panels on the inside but also because I was disappointed in the way the walls were resistant stain in many places, due to sloppy gluing at the factory.
I had removed all the windows… and they were just laying there whining, “Me next! Me next!”… What choice did I have??
I wanted to achieve a leaded glass look and initially thought to do away with the grids altogether and use lead or copper tape directly on the Plexi. However, that proved to be a little dicey for a number of reasons. The biggest concern was the loss of the stability of the frame. After several false starts, I chose to use the suggestion in the magazine article I referenced at the beginning and cut out only certain parts of the mullions.
The author of that tutorial used a craft knife to do the job but I stumbled upon something I’ve had around for a while. It’s the coolest little saw blade that fits into an Exacto handle.
Worked like silk off a spool! Only required a bit of touch up sanding. One of the things that happened when I tried the craft knife was that the pressure required to make the cut usually pushed the mullion right out of the frame at one attachment point or another, causing splintering.
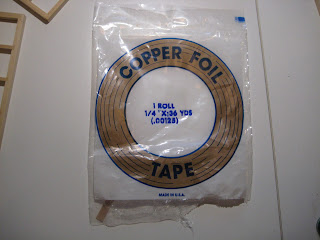
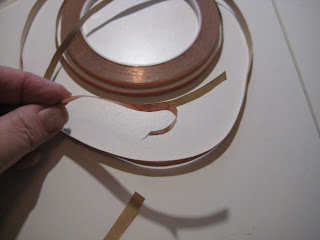
I had copper tape left from an old stained glass project, so I tried wrapping the mullions and frames with it, in an effort to get that leaded glass look.
However, I quickly realized that the “time cost” required to cover each tiny bit and then age the copper was not equal to the outcome. In other words, it wasn’t going to look any better than if I painted them…as I had done to the roof assemblage.
If you ever make this kit, I have one word of advice concerning the windows. Before you remove them, mark where each came from. Saves a lot of time refitting because even though they might look the same…they are not.
I gave each window (including all four sides of each and every mullion…) a watered down coat of a terra cotta craft paint, except on the sides which will be glued to the inside recess of the window openings in the walls. I think the terra cotta made a good base for the faux finish.
After that coat dried thoroughly, I re-sanded each and every little mullion. Fussy, but necessary for a smooth appearance. I have this wonderful set of sanding sticks/detailers I picked up at a local woodworking shop, WoodCrafters. It is a chain store. Four different grits with replaceable belts. Great tool for miniaturists who work with wood.
After the sanding, I turned my attention to the exterior side of the window. The Plexi sets into the recess and covers this surface, so technically, it is not exposed. Yet, it would still darken over time. Except for the outer edges which are covered by the exteriors walls, all window exteriors were given a wash of metallic copper which was then dulled slightly with a heavier wash of burnt sienna, followed by a light sanding when dry.
Then I concentrated on the more time consuming interior portion of the frames.
This surface, though exposed to the warmth and humidity of the Conservatory, was lovingly cared for while Titania was alive so it did not age in the way the exterior “copper” surfaces did.
(As with many victims of the Spanish Flu epidemic, she was alive and healthy one morning and dead by the next day. Her grief stricken father ordered the Conservatory sealed, just as she had left it. And so it stayed until after Aloysius’ death several years later. Livy re-opened it and the copper windows were cleaned. Unfortunately, Hester is stretched too thin to keep up with it these days and Sir Kendrick can’t be bothered.)
When copper sheeting ages, it first loses the shine, then it darkens in an uneven pattern and only after much exposure does the green patina begin to form. This also does not occur in an even way and is often quite streaky.
Several years ago, I had the opportunity to watch a natural copper roof age on the new Science bldg at the local community college. Because of our high humidity and salt air, it didn’t take long for the roof to darken and the patina to form.
The interior of the windows took six layers of finish. First a general terra cotta wash, then a darker burnt sienna “over-wash”, some burnt sienna “low lights” (patches of darker color), a wash of the green patina color and then areas of darker patina.
I wanted a final layer with just a hint of the original luster so I used mica powders in copper and green. These are meant for use on raw polymer clay or stamping but by applying the “perfect medium” first, included with the powders, it will stick to almost any surface. When it was dry, a light buffing with a soft cloth brought out the warm glow.
The window on the left is treated with the mica powders. The one on the right is not.
This will need a spray of clear coat to become permanent.
The glazing beams for the roof received a coat of metallic copper, a heavy wash of burnt sienna and several heavy washes of the patina. They are totally exposed and would have aged naturally. I am thinking of using some of the green patina mica powder on these beams also. One board was turned over so you can see the first step in the process.
The next time you see all these roofing pieces they will be assembled into the roof structure. The instructions in the kit call for leaving this as a cover which can be removed for access. Based on my dry fit, I am not sure how this can be accomplished….
Later...
Tabitha


9 comments:
Love how the story goes on :)Can't wait for more;D
Fabulous attention to detail, thank you so much for sharing all your painting and colouring stages. It is so important to take time with each layer and not rush, I am learning to be patient !!
Strange you should show the sanding tool, I have been looking at these online but have not heard them mentioned in Blogland. I normally use emery boards but they won't get int small areas.
I'm excited to see the finished window. Don't you just wish there were more hours in a day? So wonderful.l You are so very talented. I have no patience by the way. Thank you so much for sharing this. Big hugs~ Kim
Ewa...I'm loving the story myself!
Janice...so true, the more time one takes, the better the results. Those sanders are FABULOUS!! I often used an emery board also but these not only get in corners and edges, they are very ridged and sand straight better than an emery board whihc has some flex in it.
Kim...how can you you have no patience??!! You make the MOST perfect little sweets ever!!
Thanks for clueing us in on such fabulous tools! I NEED one of those tiny exacto-saws! Where did you say you found it? That and the sanders will help a LOT with my window projects!
Yours is looking AMAZING.... love the glitter powder.... where did you say you got that? (Can you tell I am still new at this? LOL)
I look forward to seeing the assembled conservatory!
Betsy, I got my tools at a local hobby shop. Micro-Mark carries similar key hole razor saws: http://www.micromark.com/Zona-Keyhole-Saber-Saw-Blade-24-TPI,8297.html
And a sanding wand set: http://www.micromark.com/Micro-Sanding-Wand-Set,7760.html
I got the mica powders at Micheals..Joann Fabrics has them too. They are Perfect Pearls by Ranger. You can look them up online. There are several varieties.
Wow Susan! Looking good, your patina is beautiful. This is going to be spectacular.Love your little story :)
Victoria ♥
Absolutely amazing... it's great to have a little peek over the shoulder of someone so talented. I would never dare to try something like this, my advantage is that my projects are for my bears so the lack of realism is covered with some fun stuff instead... ;O) I really love how the story carries on... poor Titania. I hope Hester will soon have enough time to reveal news about the brothers - and more family secrets.
Greetings
Birgit
Hi Tabs,
I love your story, bliming Spanish Flu!
Your windows and patina look great, they will be wonderful in the conservatory. We have those tools too, they are so handy :0)
Julia xxx
Post a Comment